Intro
Let's discover GetTheAudience in about 5 minutes.
Get started by creating a first audience.
Create your first audience#
Find a Twitter handle who engages with your audience. Not sure? It’s easiest to start with your own.
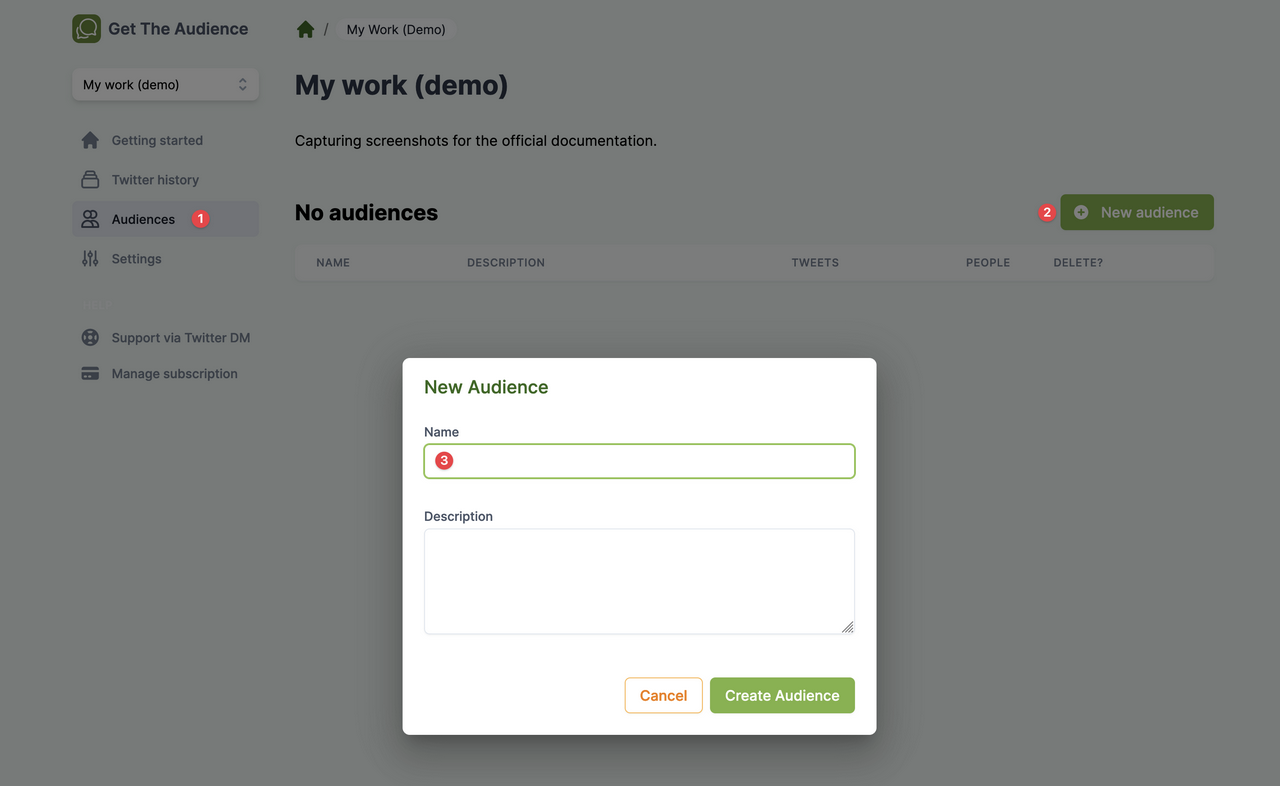
Then, name an audience:
- Go to
Audiences - Click
New audience - Enter a
nameanddescription, such as "My First Audience", and click onCreate audience.
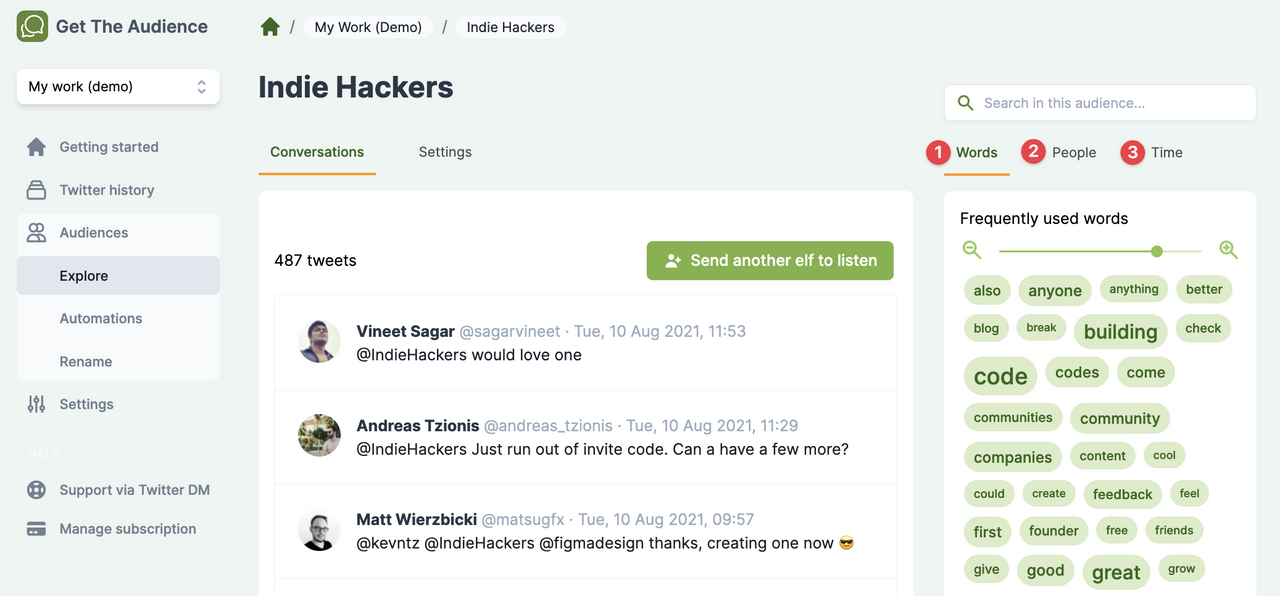
When the audience opens, send the first elf 🧝 to listen to your Twitter handle. An elf 🧝️ is a helpful little creature that goes to Twitter and listens for you. Whenever your audience has tweets from/to/mentioning a @___, then it imports those tweets to analyze.
Listen to your audience#
Words: Examine the Word Cloud of most often used keywords.
- Slide the
Frequently used wordsto narrow or widen the focus. - Click on a word to see just those tweets with that keyword.
People: See who is most engaged in the conversation. These people can be the seed for another audience, or you can add them to the current audience by sending another elf.Time: Understand when (i.e. at which hour of day) the conversations are happening
Whenever you click on words, people, or time, the tweets and the other tabs will be narrowed down as well. Examples:
- When you click on a word, the people tab only shows people who have tweeted about this word.
- When you click on an hour in the time tab, the words tab shows the words used during that hour. The people tab shows only those people who are tweeting during that same hour, and so on.